This page provides an instruction & guide for developers building a GPT Action for a specific application. Before you proceed, make sure to first familiarize yourself with the following information:
This particular GPT Action provides an overview of how to connect to Jira, Atlassian's tool for project and ticket management. This action assumes a user’s context and allows them to read and write to issues in a given project.
Value + Example Business Use Cases
Value: Users can now leverage ChatGPT's natural language capability to connect directly to Jira Cloud
Example Use Cases:
- A user can load up recent issues for a particular project and use ChatGPT to provide solutions
- A user can create and alter issues and sub-tasks and assign to specific users by instructing ChatGPT
Application Information
Application Key Links
Check out these links from the application before you get started:
- Application Website: https://<YOUR_SUBDOMAIN>.atlassian.net/jira
- Application API Documentation: https://developer.atlassian.com/cloud/jira/platform/rest/v3/intro/
- Application OAuth 2.0 Documentation: https://developer.atlassian.com/cloud/jira/platform/oauth-2-3lo-apps/
Application Prerequisites
Before you get started, make sure you go through the following steps in your application environment:
- Ensure you have the access and permissions to create an application in the Atlassian Cloud Developer Console
ChatGPT Steps
Custom GPT Instructions
Once you've created a Custom GPT, copy the text below in the Instructions panel. Have questions? Check out Getting Started Example to see how this step works in more detail.
**Context**: you are specialized GPT designed to create and edit issues through API connections to Jira Cloud. This GPT can create, read, and edit project issues based on user instructions.

**Instructions**:
- When asked to perform a task, use the available actions via the api.atlassian.com API.
- When asked to create an issue, use the user's input to synthesize a summary and description and file the issue in JIRA.
- When asked to create a subtask, assume the project key and parent issue key of the currently discussed issue. Clarify with if this context is not available.
- When asked to assign an issue or task to the user, first use jql to query the current user's profile and use this account as the assignee.
- Ask for clarification when needed to ensure accuracy and completeness in fulfilling user requests.
OpenAPI Schema
Once you've created a Custom GPT, copy the text below in the Actions panel. Have questions? Check out Getting Started Example to see how this step works in more detail.
NOTE: Replace the placeholder <CLOUD_ID> in url with your cloud environment's unique ID. You can find this value by visiting https://<YOUR_SUBDOMAIN>.atlassian.net/_edge/tenant_info
openapi: 3.1.0
info:
  title: Jira API
  description: API for interacting with Jira issues and sub-tasks.
  version: 1.0.0
servers:
  - url: https://api.atlassian.com/ex/jira/<CLOUD_ID>/rest/api/3
    description: Jira Cloud API
components:
  securitySchemes:
    OAuth2:
      type: oauth2
      flows:
        authorizationCode:
          authorizationUrl: https://auth.atlassian.com/authorize
          tokenUrl: https://auth.atlassian.com/oauth/token
          scopes:
            read:jira-user: Read Jira user information
            read:jira-work: Read Jira work data
            write:jira-work: Write Jira work data
  schemas:
    Issue:
      type: object
      properties:
        id:
          type: string
        key:
          type: string
        fields:
          type: object
          properties:
            summary:
              type: string
            description:
              type: string
            issuetype:
              type: object
              properties:
                name:
                  type: string
paths:
  /search:
    get:
      operationId: getIssues
      summary: Retrieve a list of issues
      parameters:
        - name: jql
          in: query
          required: false
          schema:
            type: string
        - name: startAt
          in: query
          required: false
          schema:
            type: integer
        - name: maxResults
          in: query
          required: false
          schema:
            type: integer
      responses:
        '200':
          description: A list of issues
          content:
            application/json:
              schema:
                type: object
                properties:
                  issues:
                    type: array
                    items:
                      $ref: '#/components/schemas/Issue'
  /issue:
    post:
      operationId: createIssue
      summary: Create a new issue
      requestBody:
        required: true
        content:
          application/json:
            schema:
              type: object
              properties:
                fields:
                  type: object
                  properties:
                    project:
                      type: object
                      properties:
                        key:
                          type: string
                    summary:
                      type: string
                    description:
                      type: string
                    issuetype:
                      type: object
                      properties:
                        name:
                          type: string
      responses:
        '201':
          description: Issue created successfully
          content:
            application/json:
              schema:
                $ref: '#/components/schemas/Issue'
  /issue/{issueIdOrKey}:
    get:
      operationId: getIssue
      summary: Retrieve a specific issue
      parameters:
        - name: issueIdOrKey
          in: path
          required: true
          schema:
            type: string
      responses:
        '200':
          description: Issue details
          content:
            application/json:
              schema:
                $ref: '#/components/schemas/Issue'
    put:
      operationId: updateIssue
      summary: Update an existing issue
      parameters:
        - name: issueIdOrKey
          in: path
          required: true
          schema:
            type: string
      requestBody:
        required: true
        content:
          application/json:
            schema:
              type: object
              properties:
                fields:
                  type: object
                  properties:
                    summary:
                      type: string
                    description:
                      type: string
                    issuetype:
                      type: object
                      properties:
                        name:
                          type: string
      responses:
        '204':
          description: Issue updated successfully
  /issue:
    post:
      operationId: createSubTask
      summary: Create a sub-task for an issue
      requestBody:
        required: true
        content:
          application/json:
            schema:
              type: object
              properties:
                fields:
                  type: object
                  properties:
                    project:
                      type: object
                      properties:
                        key:
                          type: string
                    parent:
                      type: object
                      properties:
                        key:
                          type: string
                    summary:
                      type: string
                    description:
                      type: string
                    issuetype:
                      type: object
                      properties:
                        name:
                          type: string
      responses:
        '201':
          description: Sub-task created successfully
          content:
            application/json:
              schema:
                $ref: '#/components/schemas/Issue'
security:
  - OAuth2:
      - read:jira-user
      - read:jira-work
      - write:jira-work
Authentication Instructions
Below are instructions on setting up authentication with Jira. Have questions? Check out Getting Started Example to see how this step works in more detail.
Jira Steps
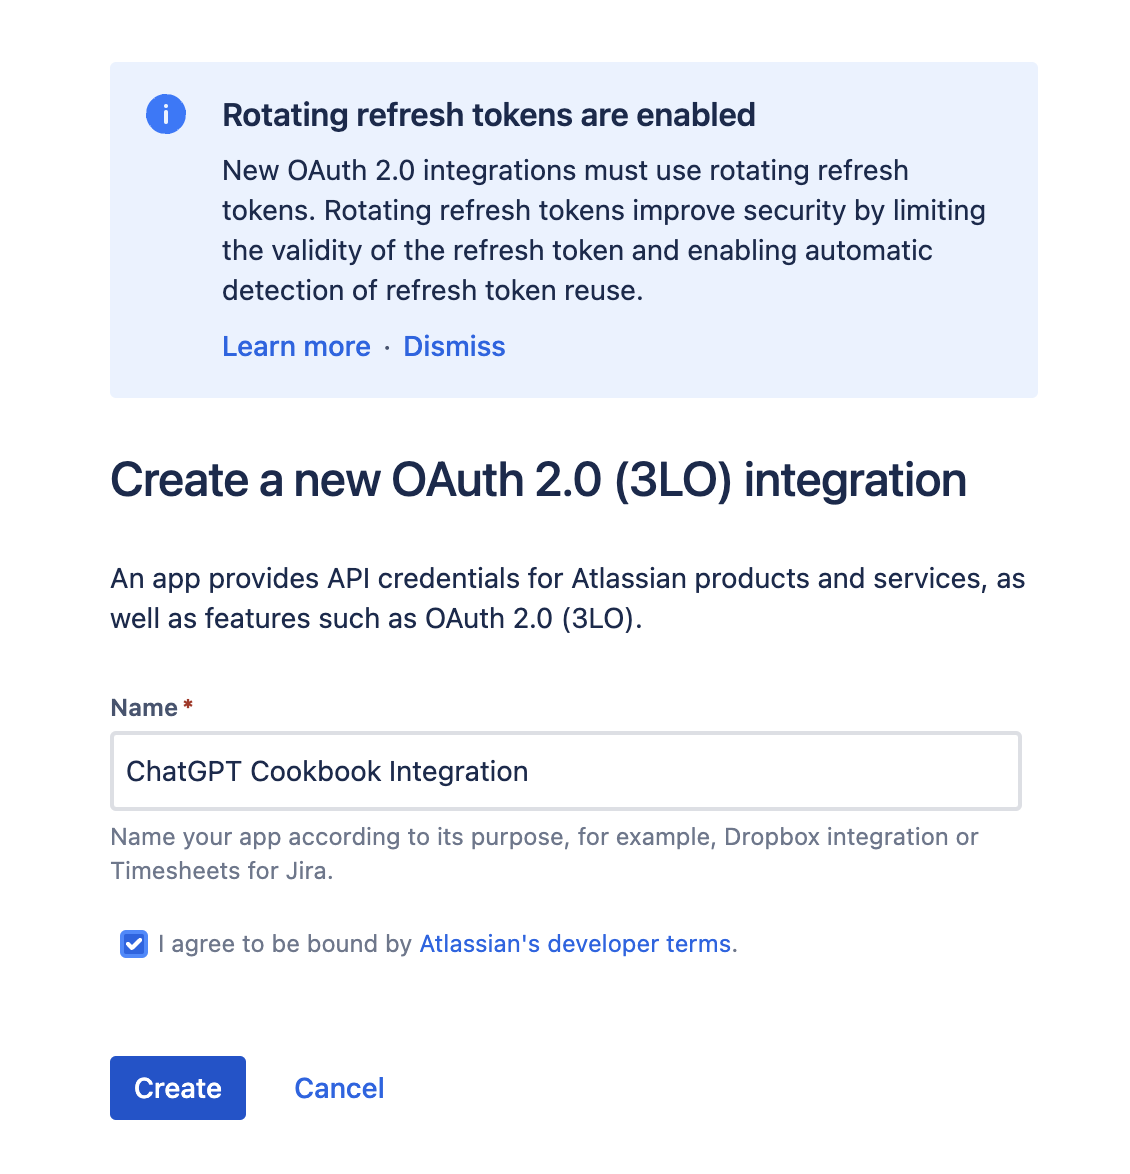
- Create an Application: The first step is to create a new application in Jira for the integration with ChatGPT. This can be done by visiting the Atlassian Developer Console, Clicking Create and selecting OAuth 2.0 Integration.
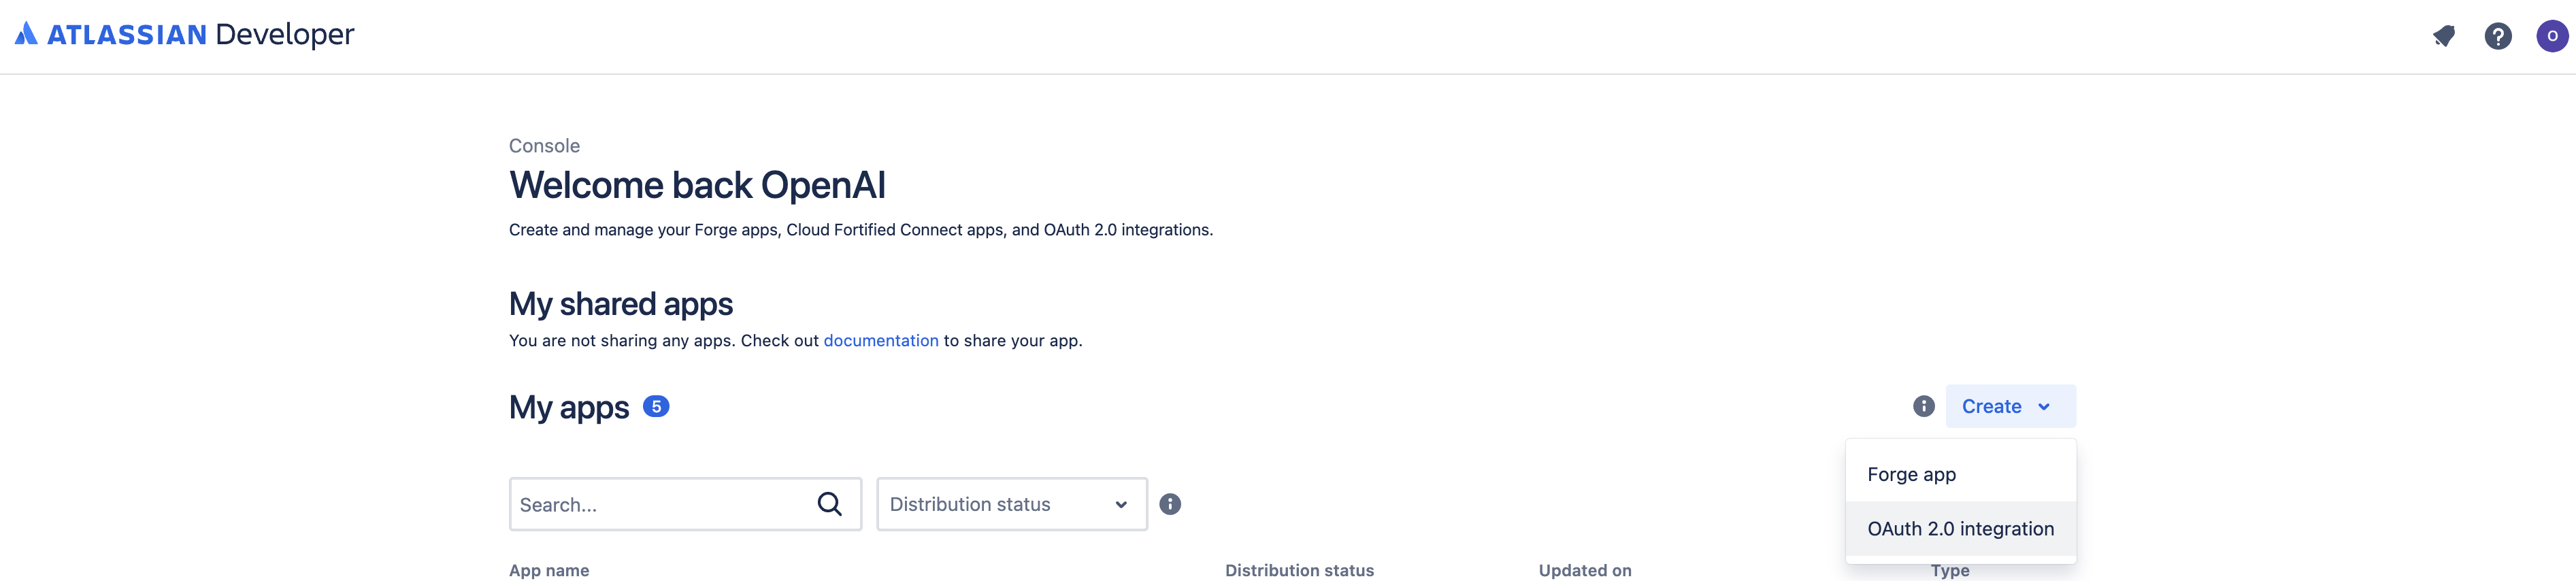
From here, simply enter the name of your integration and click Create.
- Define Permissions: Next we need to provide the required permissions to our application. Within the new application, open the Permissions menu from the sidebar, locate Jira API and click Add and then Configure.
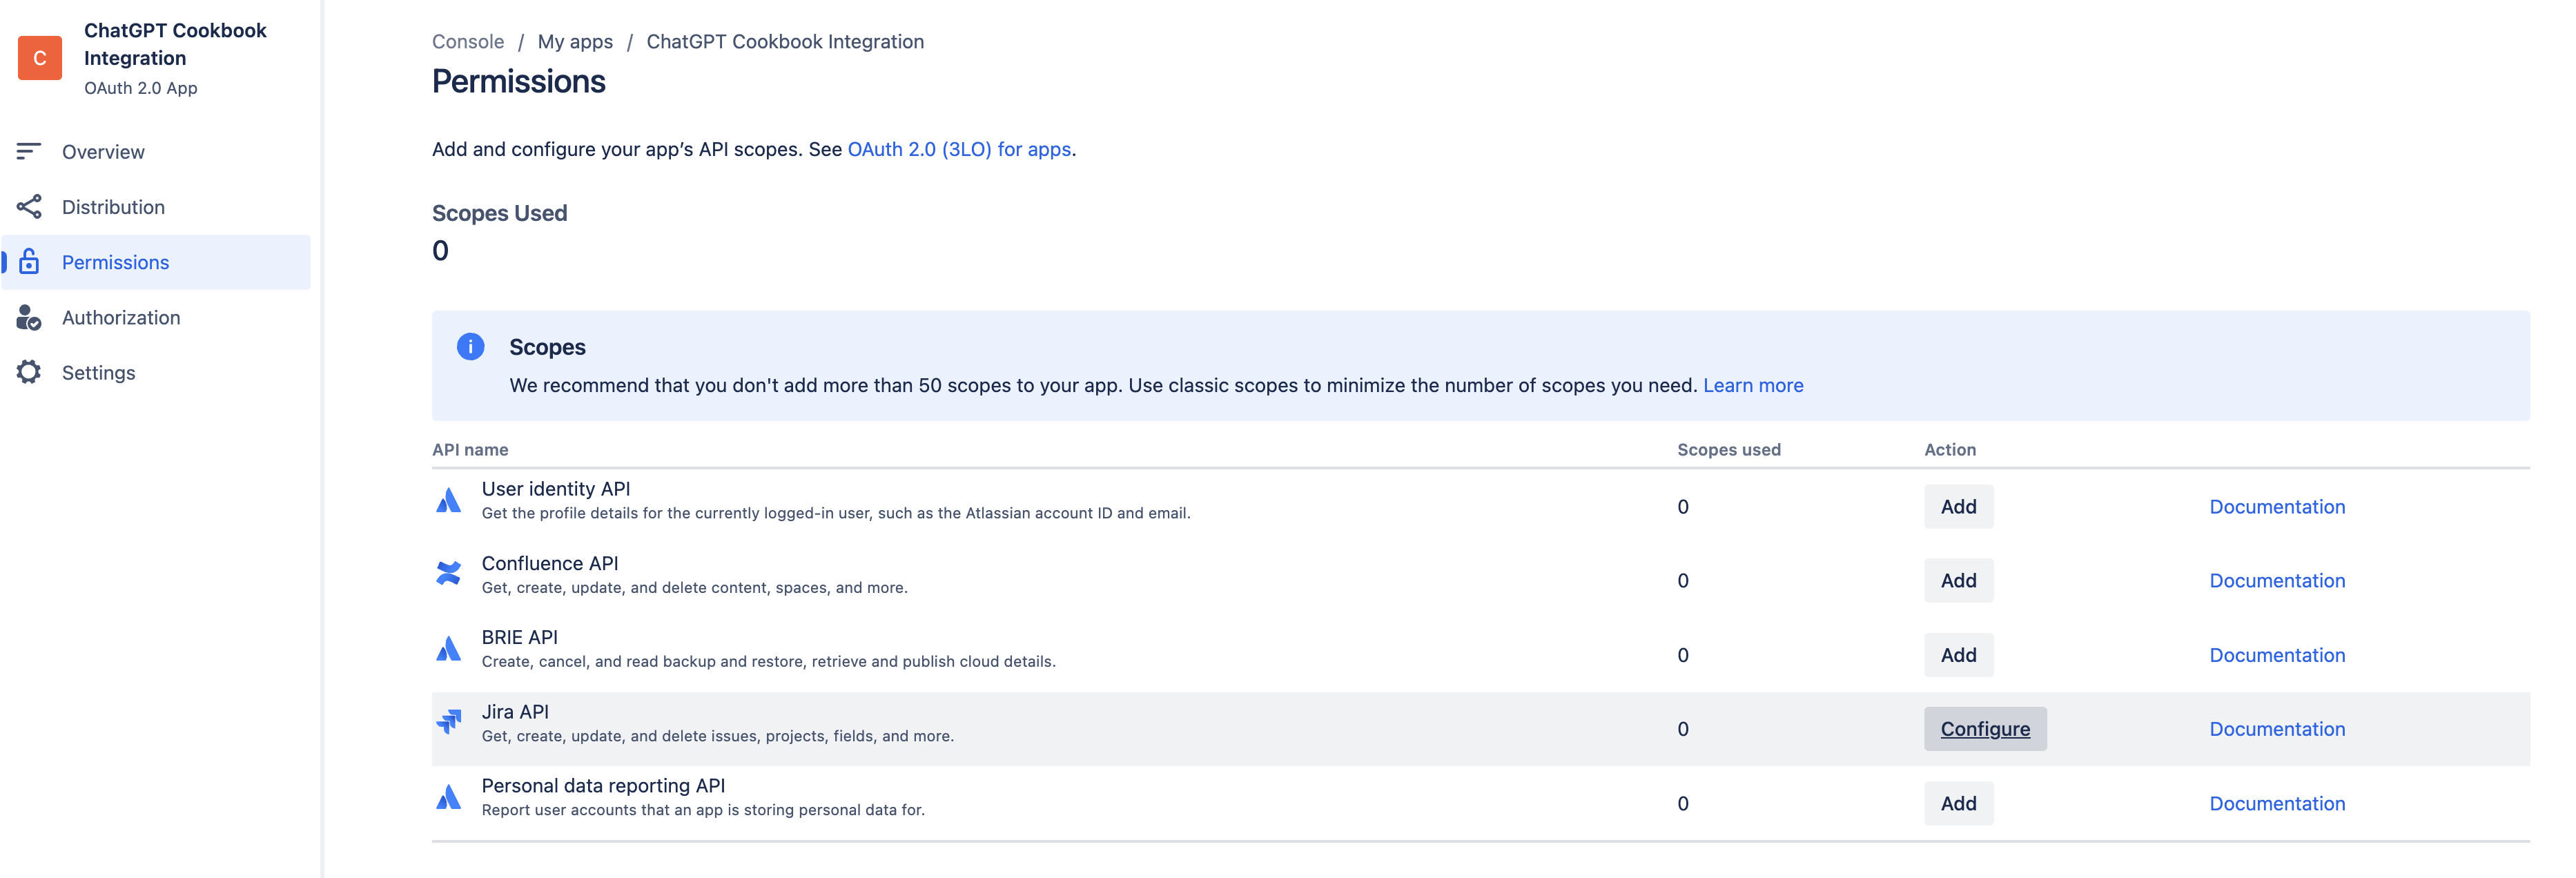
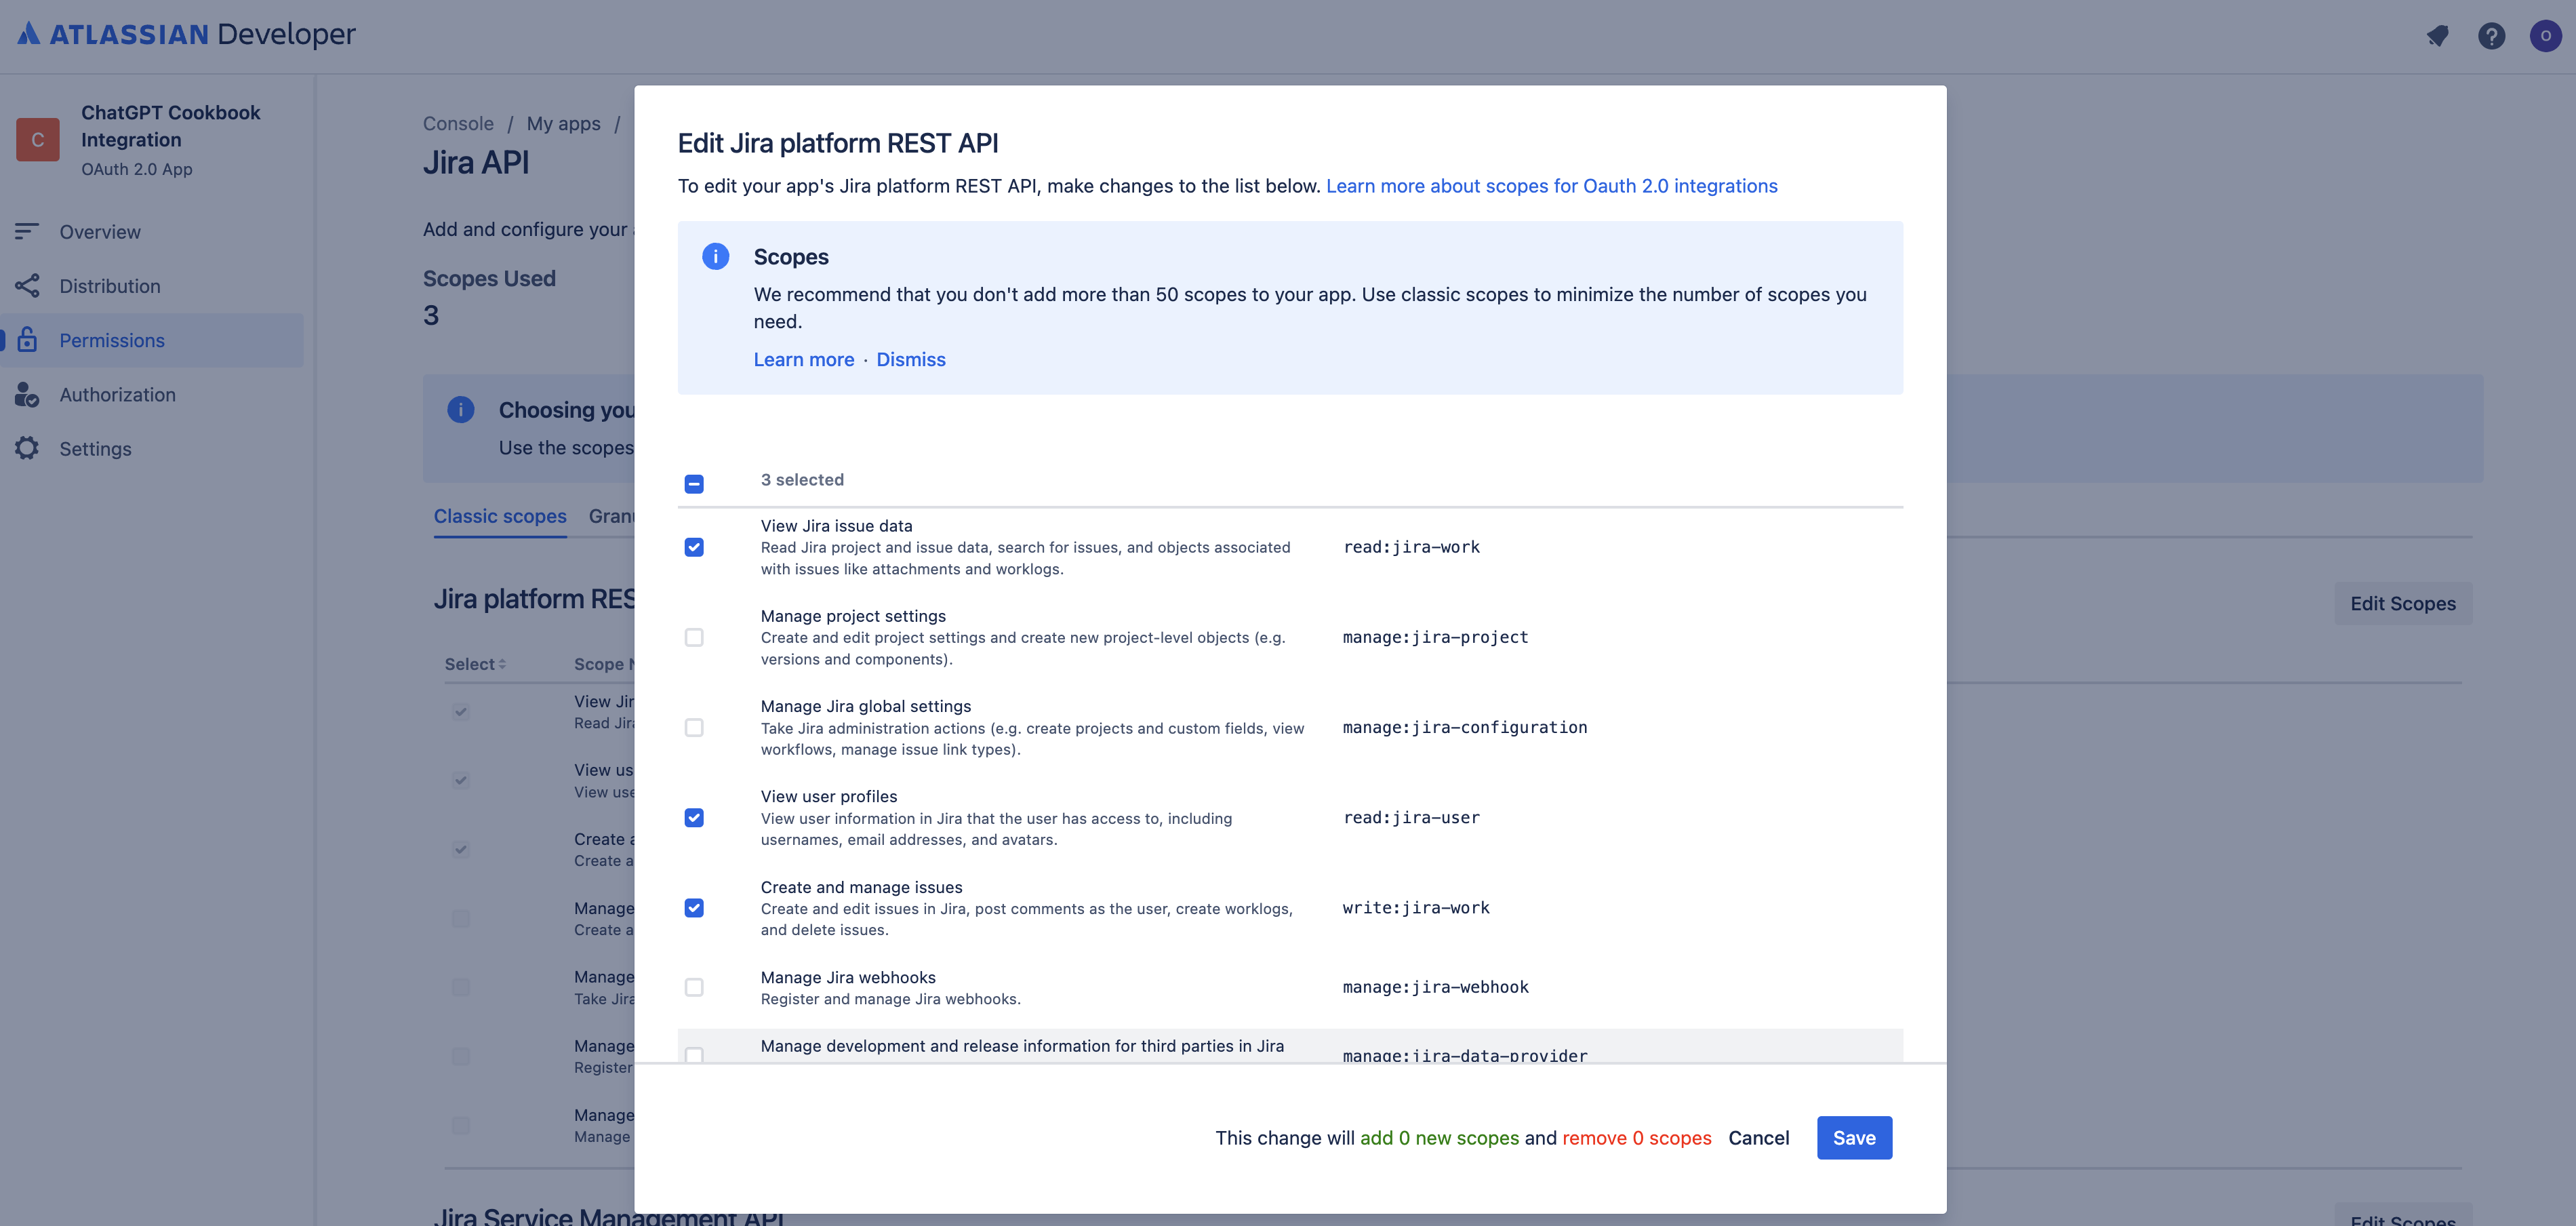
Required permissions will vary depending on the intended functionality of the GPT. In this scenario we wish to read and write to Jira issues, so select the following scopes under Jira platform REST API by clicking Edit Scopes:
- read:jira-work
- write:jira-work
- read:jira-user
Once selected, click Save
- Configure Placeholder Callback URL: In order to complete the following step and obtain a Client ID and Secret for enabling secure authentication between ChatGPT and Jira, we first need to add a placeholder callback URL. We can achieve this by clicking on Authorization in the sidebar, and Configure next to OAuth 2.0 (3LO). From here simply enter a placeholder URL and click Save Changes.
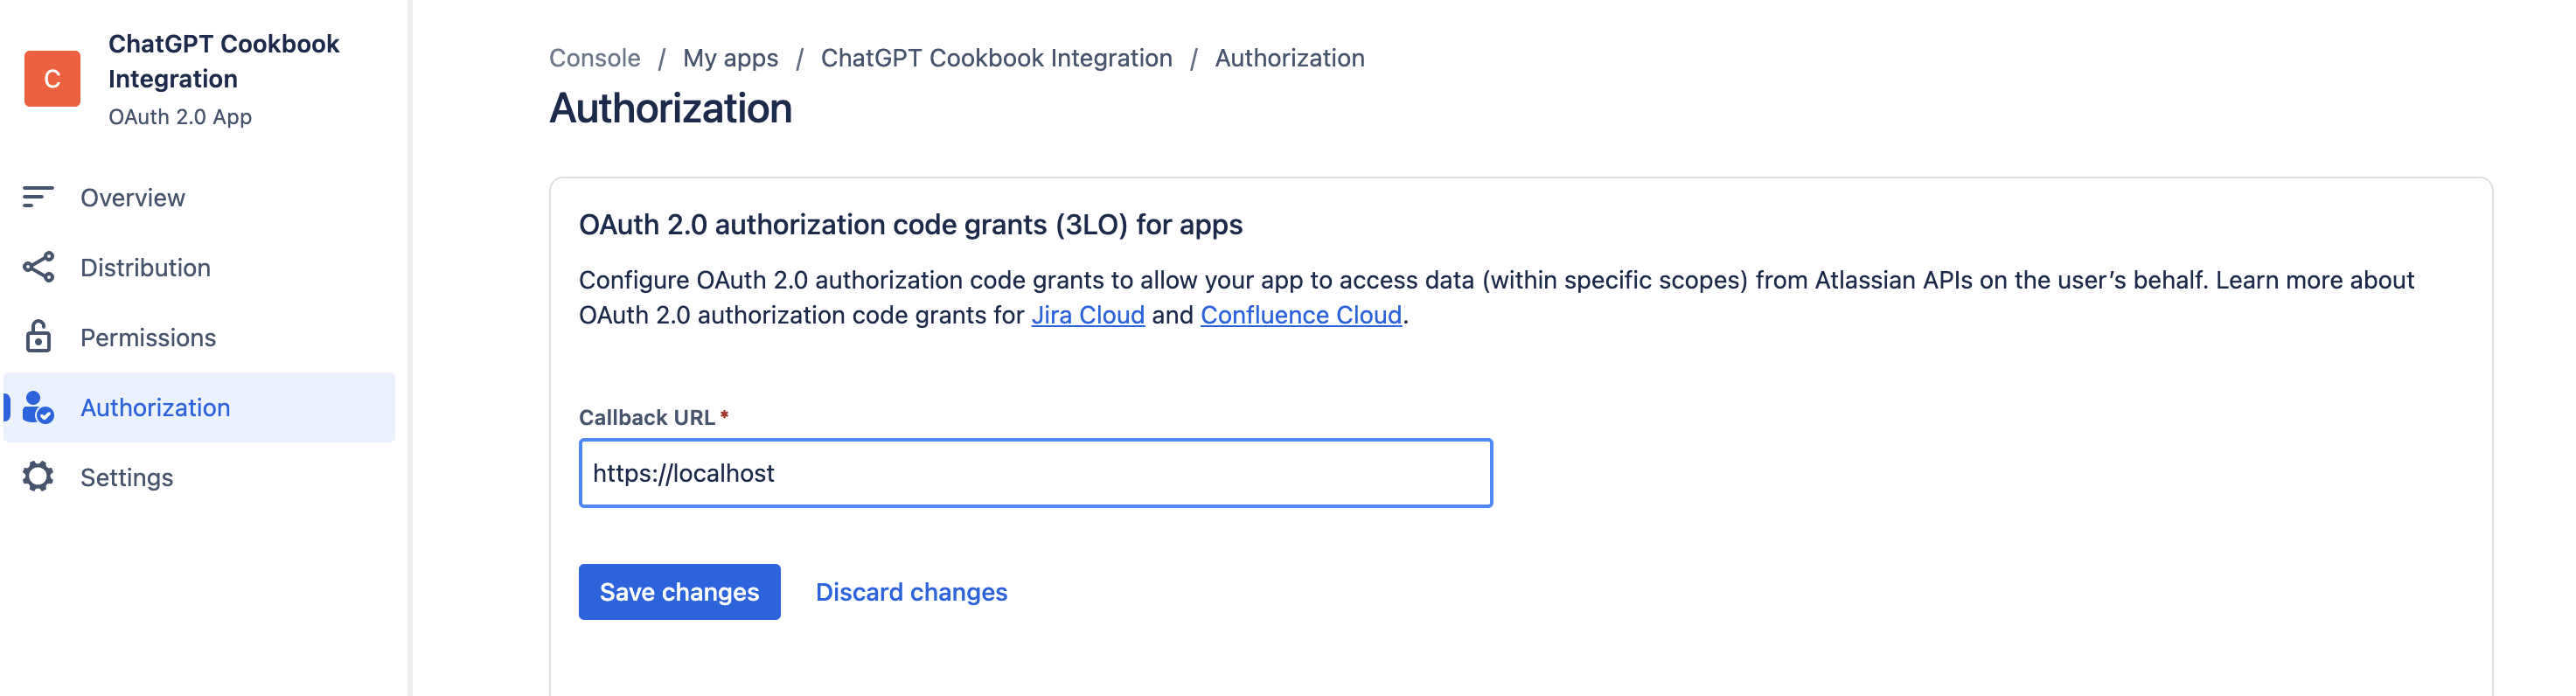
-
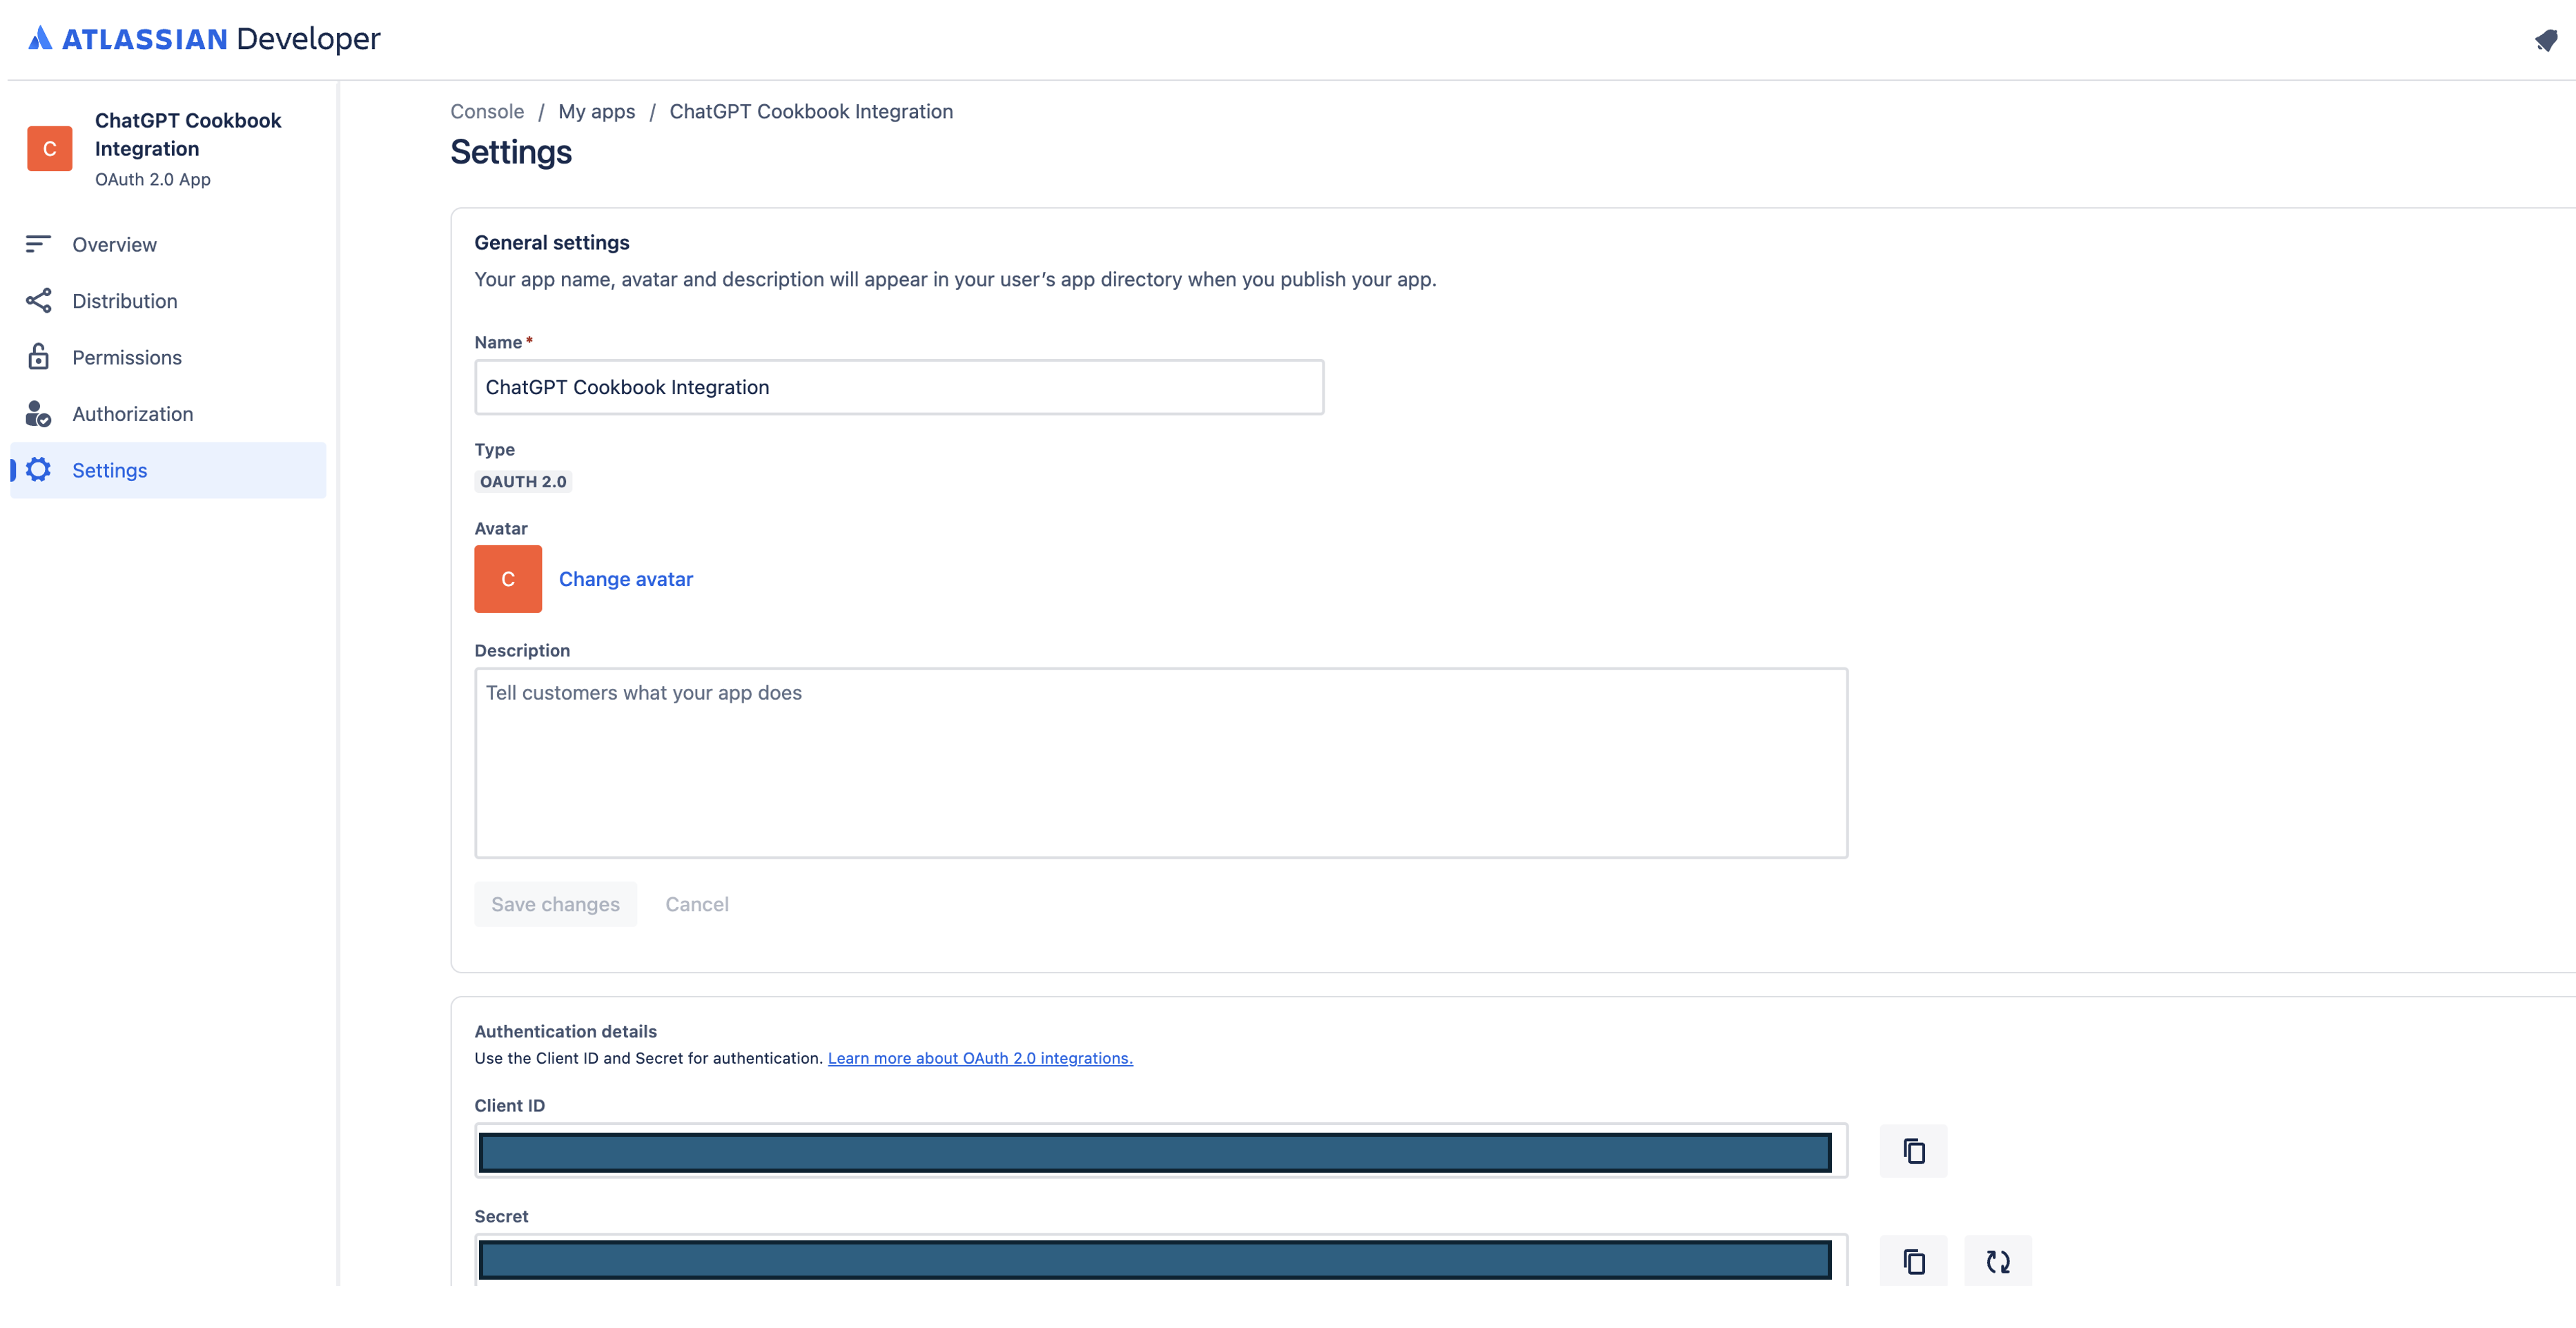
Application Client ID/Secret: The next step is to locate the Client ID and Secret for enabling secure authentication between ChatGPT and Jira. We can find these values by clicking on Settings in the sidebar and scrolling down to Authentication Details.
Keep this page open as we will require these values in the next stage of configuration!
In ChatGPT
In ChatGPT, click on "Authentication" and choose "OAuth". Enter in the information below.
- Client ID: The Client ID from Step 3 of Jira Configuration
- Client Secret: The Secret from Step 3 of Jira Configuration
- Authorization URL: https://auth.atlassian.com/authorize
- Token URL: https://auth.atlassian.com/oauth/token
- Scope: read:jira-work write:jira-work read:jira-user
- Token Exchange Method: Default (POST Request)
Post-Action Steps
Once you've set up authentication in ChatGPT, follow the steps below in the application to finalize the Action.
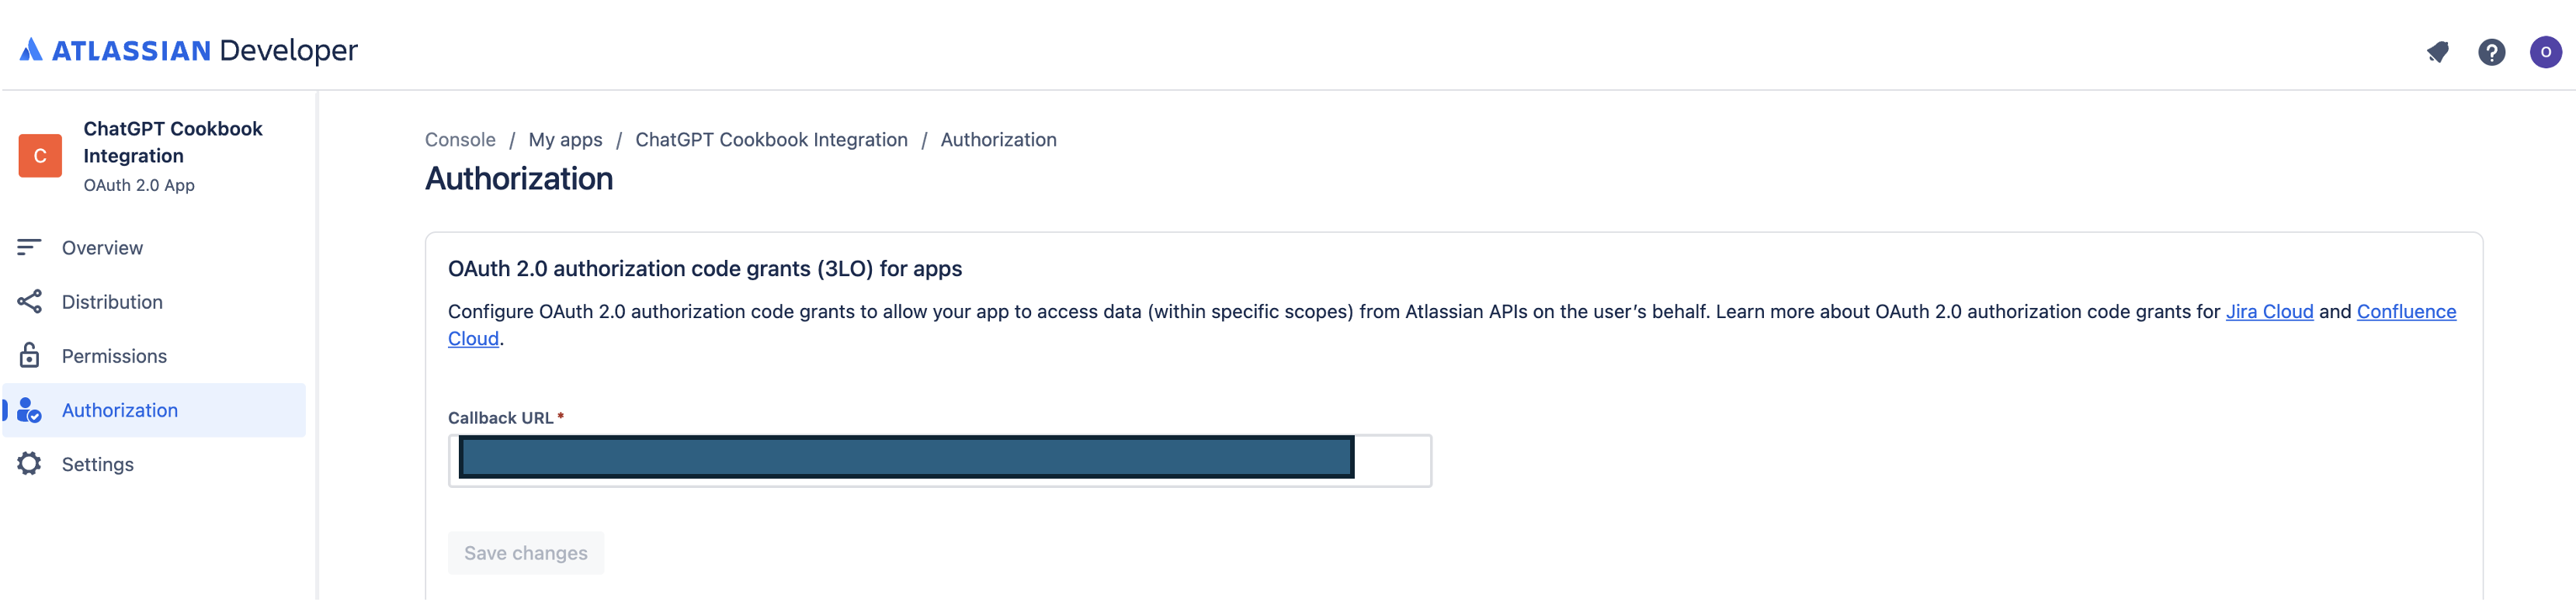
- Copy the callback URL from the GPT Action
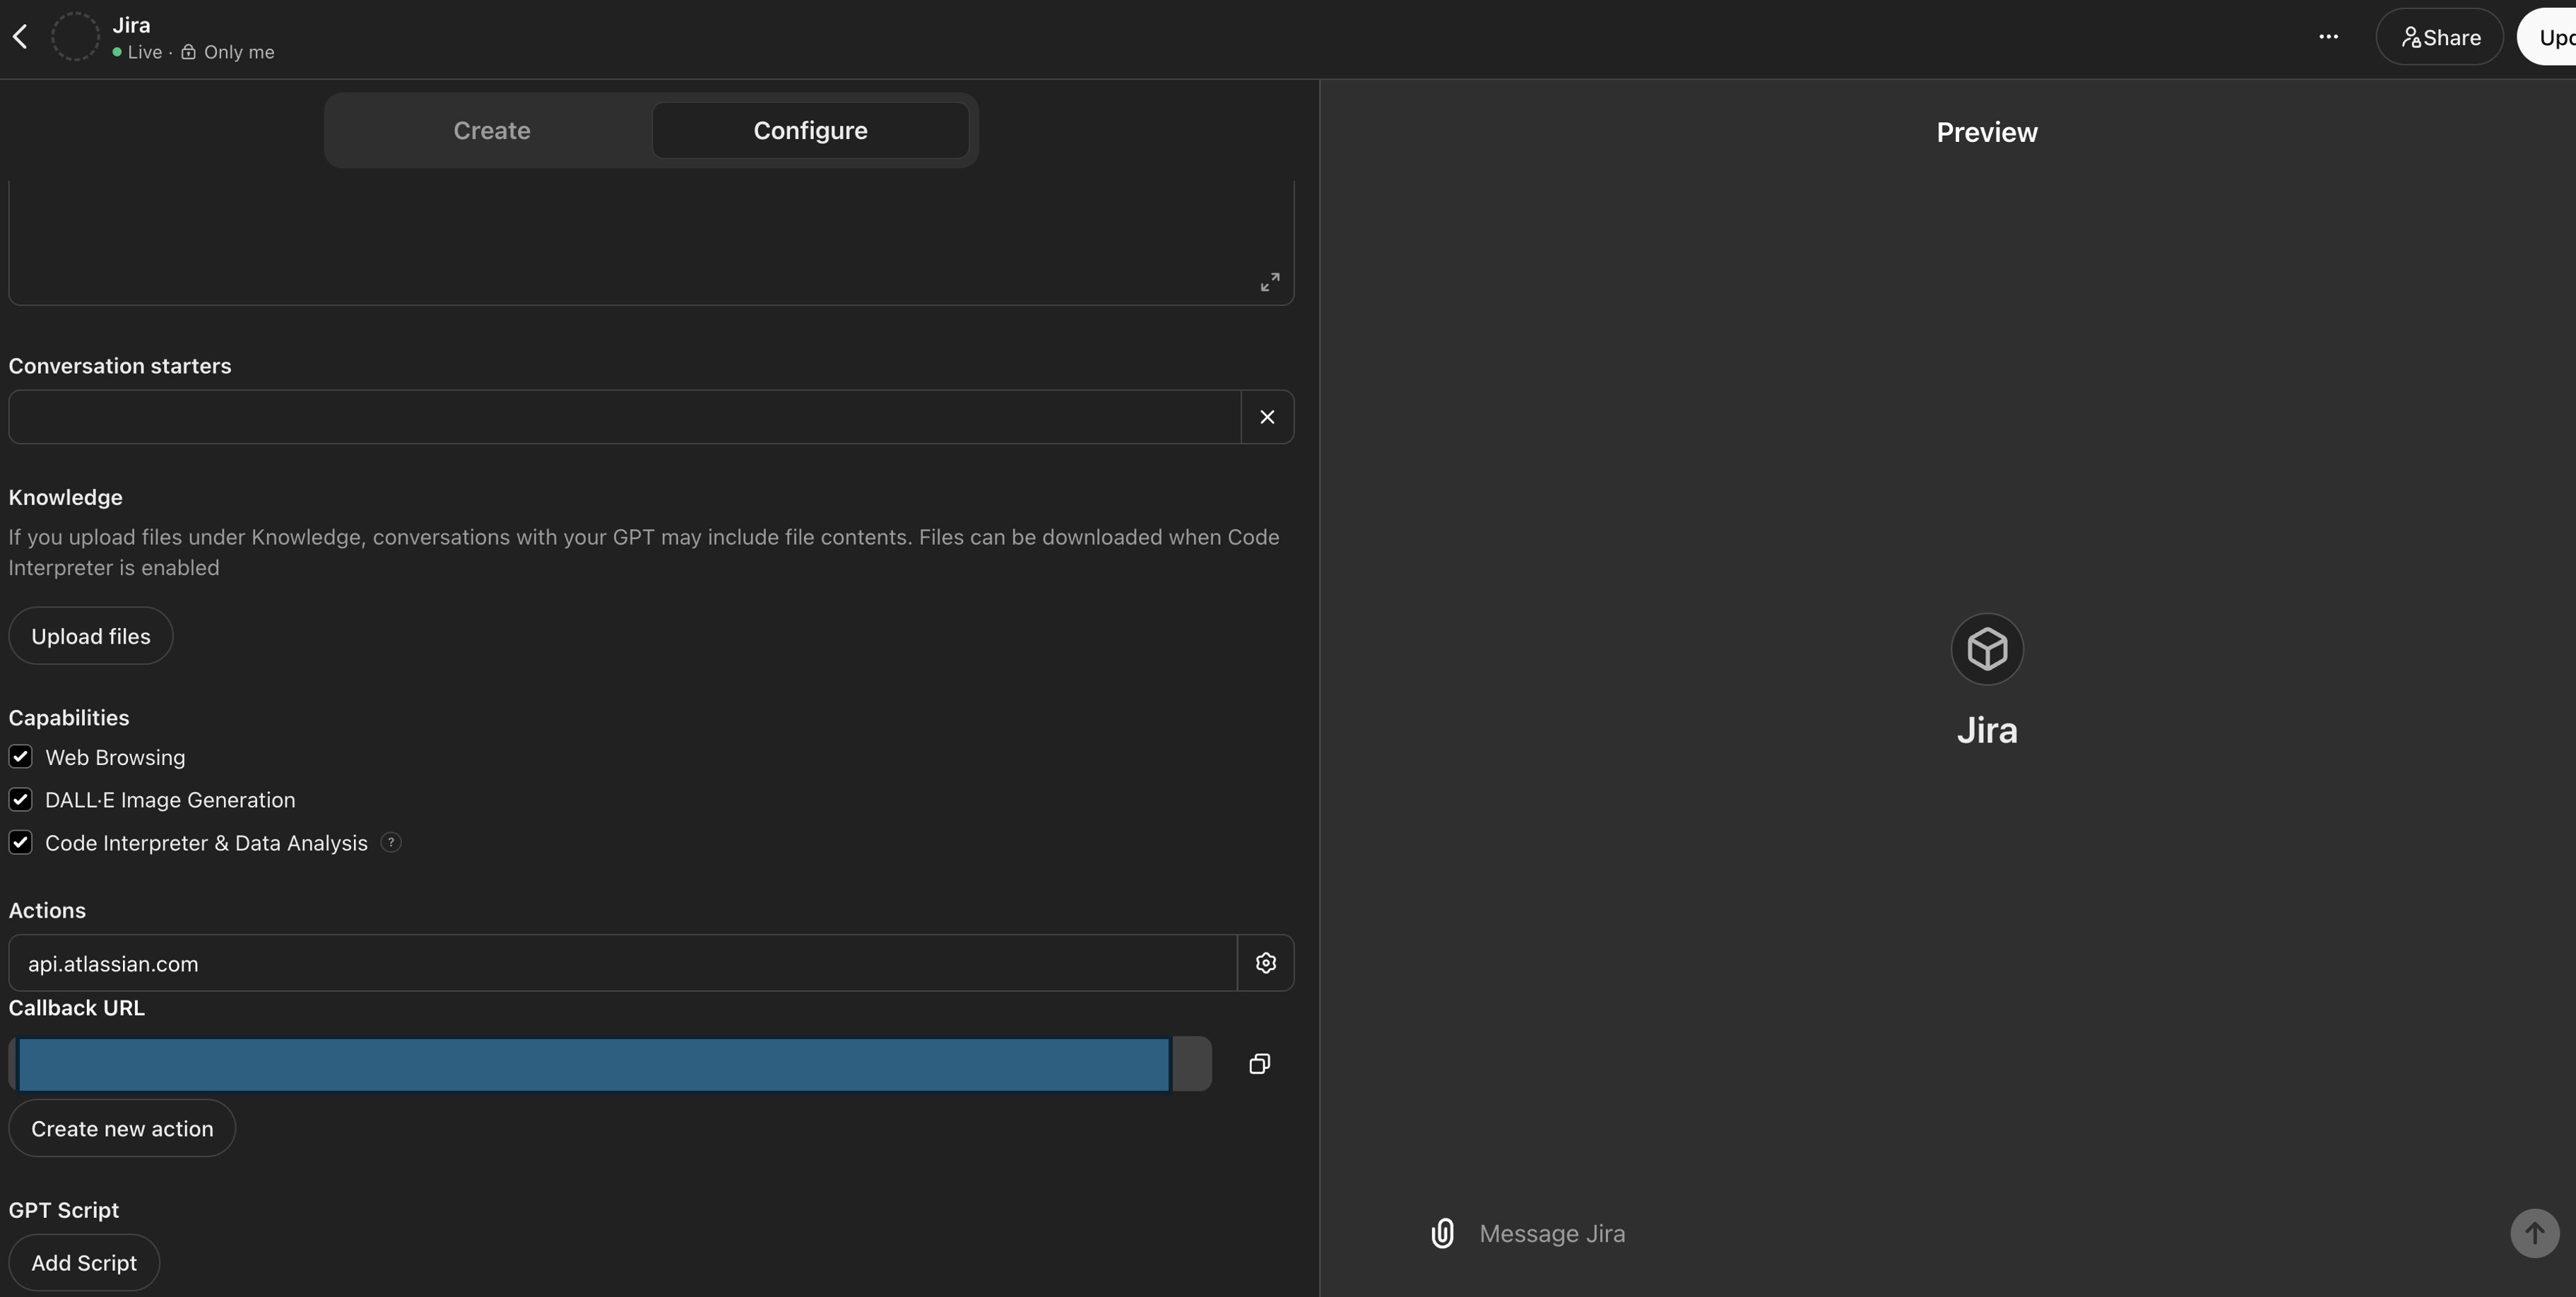
- In your application in the Atlassian Developer Console, navigate to the Authorization sidebar tab, next to OAuth 2.0 (3L0) click Configure, and add your callback URL under Callback URL
FAQ & Troubleshooting
- Callback URL Error: If you get a callback URL error in ChatGPT, double check the Callback URL value as it can occasionally change depending on any alterations made to the authentication
Are there integrations that you’d like us to prioritize? Are there errors in our integrations? File a PR or issue in our github, and we’ll take a look.